Visualising Data#
This guide covers setting up and running real-time telemetry streaming and 3D kinematic visualization for the Svan M2 Quadruped Robot using the Svan M2 PlotJuggler Plugin Suite.
1. Prerequisites#
Important
At the very minimum, the wired network profile configuration described in Receiving Topics must be completed and active before proceeding.
Ensure your network connection is verified:
Host IP configured:
192.168.123.10Robot ping test passing:
ping 192.168.123.3Topics visible via
cyclonedds lsorros2 topic list
2. Svan M2 PlotJuggler Plugin Suite#
Real-time telemetry streaming and 3D kinematic visualization are provided by the Svan M2 PlotJuggler Plugin Suite.
For in-depth architecture diagrams, complete IDL topic mappings, and internal math specifications (PD torques, mechanical power, tracking error formulas), refer directly to the m2-pj Repository README.
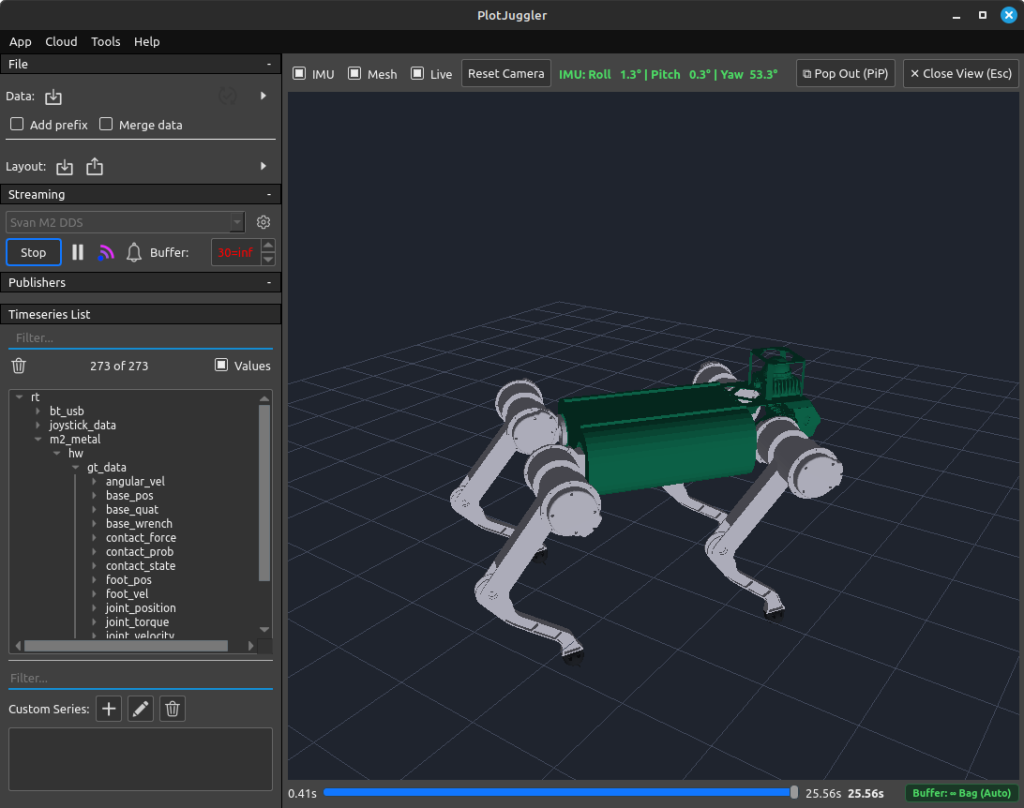
PlotJuggler with Svan M2 DDS Plugin#
3. Getting Started#
System Requirements & Dependencies#
Operating System: Ubuntu 22.04 or 24.04 (x86_64)
Compiler: GCC 9+ / Clang 10+ with C++17 support
Core Dependencies: CMake (3.16+), Qt5 (
Widgets,Xml,OpenGL,Network,Svg)
Clone the repository with submodules:
git clone --recursive https://github.com/yourusername/m2-pj.git
cd m2-pj
Install standard development dependencies:
./scripts/install_ubuntu_deps.sh
Building the Plugin Suite#
Run the automated build script, which handles submodules, dependencies, compilation, tests, and bundle assembly:
./scripts/build_local_bundle.sh
Launching PlotJuggler#
Launch PlotJuggler with the plugin bundle loaded:
# Default Canonical Mode (clean raw IDL channels)
./scripts/run_plotjuggler.sh

# Enhanced Mode (enables PD torques, power calculations, leg & multi-curve aliases)
./scripts/run_plotjuggler.sh --enhanced
4. Workflows#
Option A: Live Robot Operation#
Connect your host machine to the Svan M2 network via Ethernet (configured as
192.168.123.10).Launch PlotJuggler in enhanced mode:
./scripts/run_plotjuggler.sh --enhancedIn PlotJuggler, click the gear/wrench icon next to Svan M2 DDS under Streaming options:
Select your robot’s DDS Domain ID (default:
0).Choose your active network interface (e.g.,
eth0or your wired interface).
Click Start to begin streaming telemetry.
Press Ctrl+Shift+R to open the 3D Robot View.
Option B: Replaying Recorded Rosbags#
To replay an existing Svan M2 MCAP bag into PlotJuggler:
Terminal 1: Start PlotJuggler in bag mode (configures buffer to retain full recording):
./scripts/run_plotjuggler.sh --bag --enhancedClick Start under Svan M2 DDS in PlotJuggler.
Terminal 2: Play the bag with the standalone player:
./scripts/play_bag.sh xtr_rosbags/testbag4/testbag4_0.mcapPlay at 2x speed:
./scripts/play_bag.sh <path_to_bag> 2.0Loop continuously:
./scripts/play_bag.sh <path_to_bag> 1.0 --loop
Open the 3D Robot View (Ctrl+Shift+R). Use the slider at the bottom of the 3D window to scrub back and forth through time.
Option C: Synthetic Telemetry (No Hardware Required)#
You can verify the entire pipeline without a physical robot using the built-in mock publisher:
Terminal 1: Start the mock publisher (publishes 500 Hz
SensorData, 200 HzJointData, 20 HzJoyData):./build/m2_mock_publisherTerminal 2: Start PlotJuggler:
./scripts/run_plotjuggler.sh --enhancedIn PlotJuggler:
Under Streaming in the left sidebar, select Svan M2 DDS and click Start.
Drag curves (e.g.,
sensor_data/joint/00/q,enhanced/00/tau_des, orjoints*/q) onto the plot area.Open Tools → Svan M2 Robot View (or press Ctrl+Shift+R) to observe the 3D quadruped moving in real-time.
5. User Interface & Controls#
3D Robot View Controls#
Action |
Control |
|---|---|
Orbit / Rotate View |
Left-click + Drag |
Pan Camera |
Right-click + Drag (or Middle-click + Drag) |
Zoom In / Out |
Mouse Wheel |
Reset Camera View |
Click Reset Camera button |
Toggle 3D View On / Off |
Ctrl + Shift + R |
Pop Out to Floating Window (PiP) |
Ctrl + Shift + P or Ctrl + Shift + D |
Close View / Return to Plots |
Esc |
IMU Toggle |
Checkbox: align 3D body with onboard IMU vs. fixed ground |
Mesh Toggle |
Checkbox: toggle 3D STL meshes vs. kinematic stick skeleton |
Live / Scrub Mode |
Toggle Live checkbox or drag timeline slider |
Buffer Management |
Click Buffer button to toggle 30s rolling vs. full bag retention |
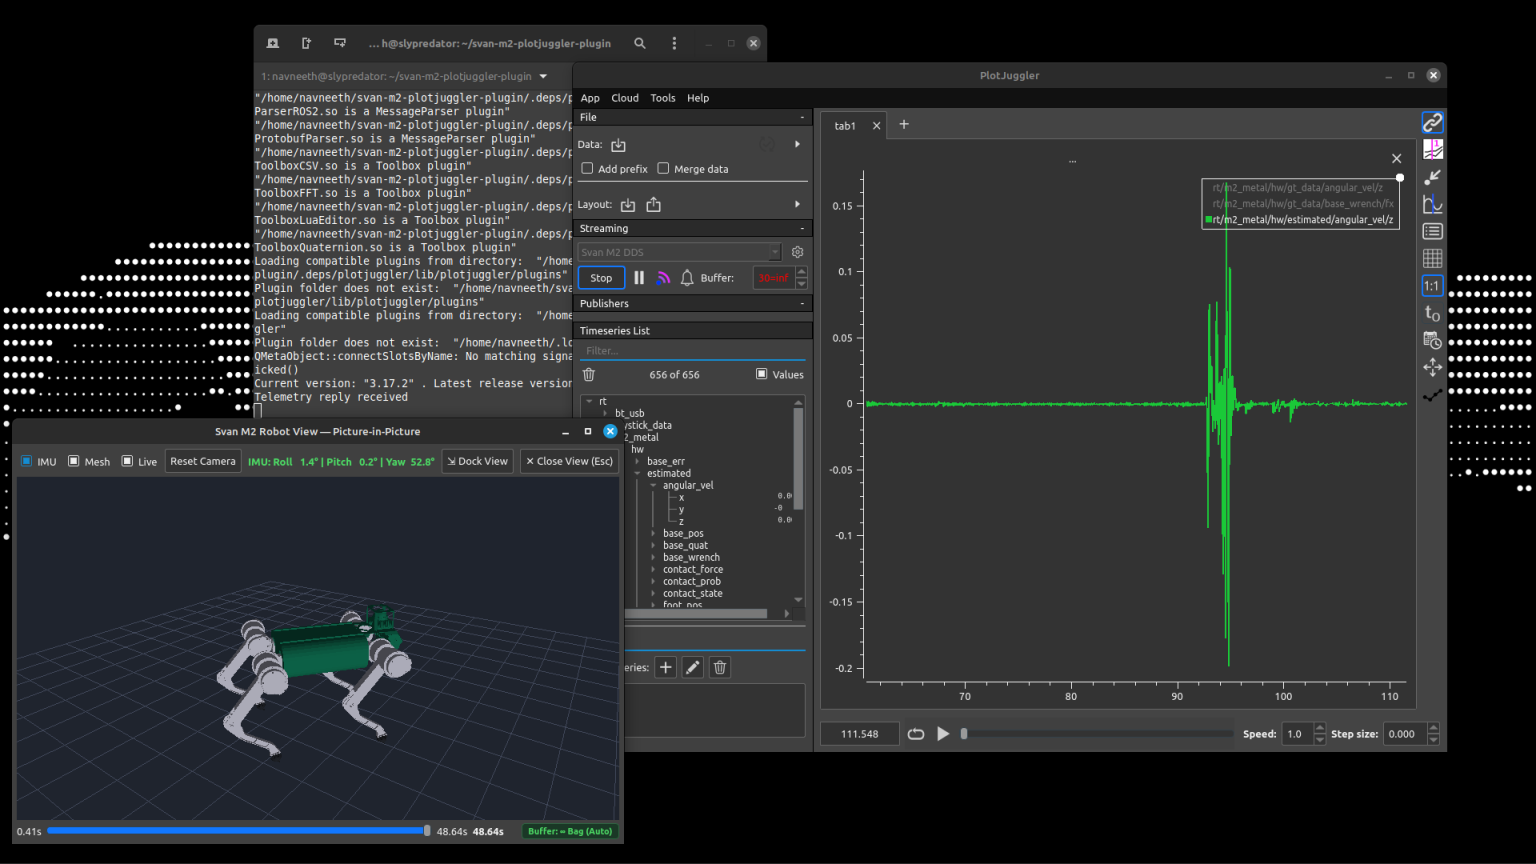
3D Robot View#
CLI Launcher Reference#
./scripts/run_plotjuggler.sh [OPTIONS] [PLOTJUGGLER_ARGS...]
Flag |
Description |
|---|---|
|
Enables derived mathematics (PD torques, instantaneous power, tracking errors, leg aliases). |
|
Pre-sets PlotJuggler streaming buffer to maximum (retains entire bag without rolling discard). |
|
Pre-sets PlotJuggler buffer to 30-second rolling window (recommended for live testing). |
|
Manually specifies buffer retention window in seconds. |
Other arguments |
Transparently forwarded directly to PlotJuggler (e.g., |
6. Automated Testing#
Run the full automated test suite with CTest:
ctest --test-dir build --output-on-failure
Included test targets:
m2_message_flatten_smoke: Verifies deserialization and math accuracy of derived metrics ($\tau_{\text{des}}$, mechanical power, tracking errors).m2_dds_loopback_test: Spawns a CycloneDDS participant, publishes live binarySensorData, and verifies end-to-end network loopback reception.m2_bag_player_smoke: Verifies standalone MCAP extraction and DDS packet dispatch.